Uploading a design.
How do I upload my design?
So, you have a design and an item picked out but you're stuck on how to get that artwork file where it belongs: on your item.
Step 1:
Go to the design studio.
Step 2:
Select the 'My Art' tab.

Step 3:
Click the 'Upload New Art File' button.

Step 4:
Click 'Choose File'

(The remove white button will remove all of the white from your upload visually. This can make some designs look a bit odd in the design studio. Rest assured, we will make everything look proper during the proof process.)
Step 5:
Select embellishment colors.

Step 6:
Click Upload.

Step 7:
Reposition as needed and 'Save Image'

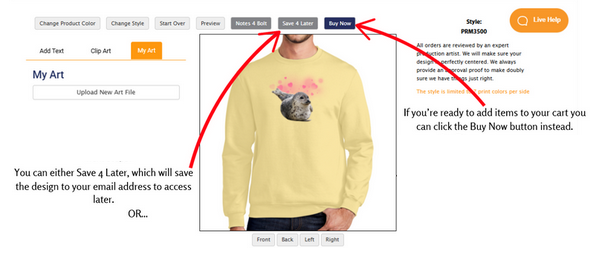
Step 8:
'Save 4 Later' or 'Buy Now'
Save 4 Later will let you save your design
Buy Now will open a size breakdown menu to add your needed quantities to your cart.